Situation: After turning flash on and off, the Pixel 3 turn into black screen. Can’t turn off or on.
Troubleshooting: Press and hold the Power key for 30 seconds or even more and when the logo shows up on the screen, release it.
Situation: After turning flash on and off, the Pixel 3 turn into black screen. Can’t turn off or on.
Troubleshooting: Press and hold the Power key for 30 seconds or even more and when the logo shows up on the screen, release it.
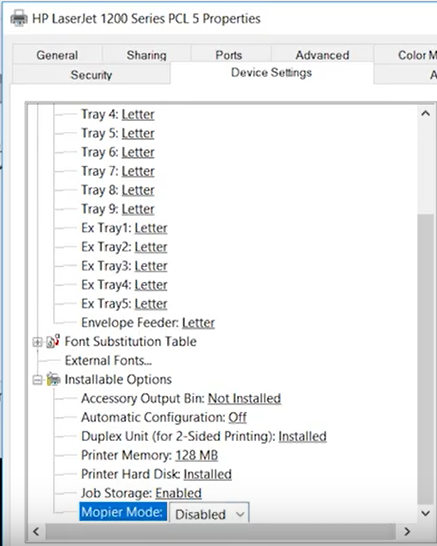
Situation: The client has a problem to print multiple copies. When he tries, he get this message: Only one copy was printing while more than one copy required. RAM disk is full or not enabled. Or, SSD or SD Card is full.
Troubleshooting: If it is HP printer, try to disabling Mopier mode.
Situation: The client tries to install Adobe Pro X, but he can’t. It keeps popup saying he doesn’t have a permission or can’t access Adobe folder.
Troubleshooting: 1. Install the Adobe by checking Run as admin.
2. Set the entire Adobe preferences folder with full permissions in
3. Remove all previous versions of Acrobat or Reader, and then reinstall.
4. Set full permissions on Adobe folder.
5. Login admin account and try it.
6. In our case, since we can’t delete the Adobe folder, we restart the computer, delete Adobe folder. then we can install it.
There are many apps to mirror iPad/iPhone screen to a computer. Here are some of them.
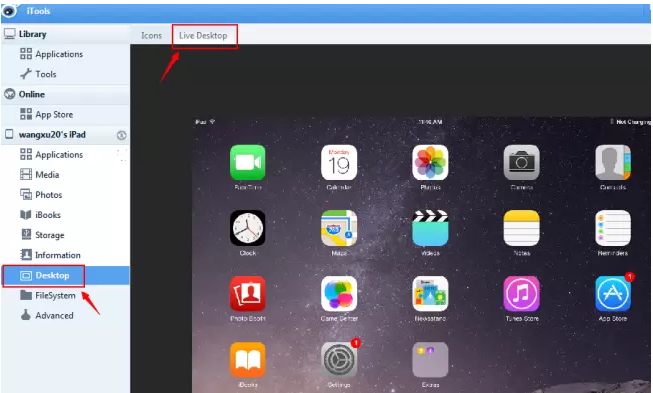
Keep your iPad activated and mirror iPad screen on computer.
3. ApowerManager: is also completely compatible with iOS and Android operation system. 1) Download/install this tool and connect iPad to computer through USB cable. 2) Launch the ApowerManager. Click “Tools” tab on the top of the interface. Open “iOS Recorder”. 3) Make sure your iPad and PC are connected to the same WiFi network. On your iPad, swipe up from the bottom and tap “Screen Mirroring”. 4) Choose the name of your computer. 5) Then your iPad screen will be mirrored to the computer. Click “Start recording” to record the phone screen. Or click “Screenshot” to take a screenshot. Under “Options” > “Recording settings” > “Audio input”, you can choose to record system sound, microphone or both.
4. Reflector 2: Here is how. 1) First, you’ll need to install Reflector 2 on your PC. A seven-day free trial is available, or if you’ve already purchased, you can download here. Follow the on-screen instructions for installation. Once installed, launch the application. 2) Connect your PC and your iPad to the same network. 3) On your iPad, swipe up from the bottom of the screen to reveal the control center. 4) The AirPlay option is to the right of the AirDrop option and only appears if an AirPlay destination (Reflector 2 in this case) is available.
The AirPlay option is to the right of the AirDrop option and only appears if an AirPlay destination (Reflector 2 in this case) is available. 5) Select your PC’s name from the list. 6) Tap the mirroring toggle below the PC name to begin mirroring. 7) Your iPad screen will appear on your PC.
5. ApowerMirror: It’s compatible with both Android and iOS system and enables you to stream phone and iPad screen to your computer. 1) Download and install ApowerMirror both on your computer and iPad. 2) Make sure your phone and computer are connected to the same WiFi network. Open “Control center” and tap “Screen Mirroring” to choose the name of your device. 3) Then your iPad screen will be streamed to the computer.
Backlight photography literally means any type of photography wherein the primary light source is positioned behind the subject. Here are some tips.

2. Light resources: When we take backlit photography, the back ground may be over exposure while the subject is dark. You may use offline flash. However, the flash may watch out the background. It is recommended to use reflector. In the follow example, we use phone flash.

3. Position and diffuse the Sun. Find a location where the sun can be partially covered by your camera, or use subject blocking the sun
while still allowing the light to shine onto your subjects. Change your position or subject position.

4. Focus: use spot metering and single focus so that you can get the right exposure for them rather than the background. In addition to spot metering, try using manual mode when focusing rather than automatic.
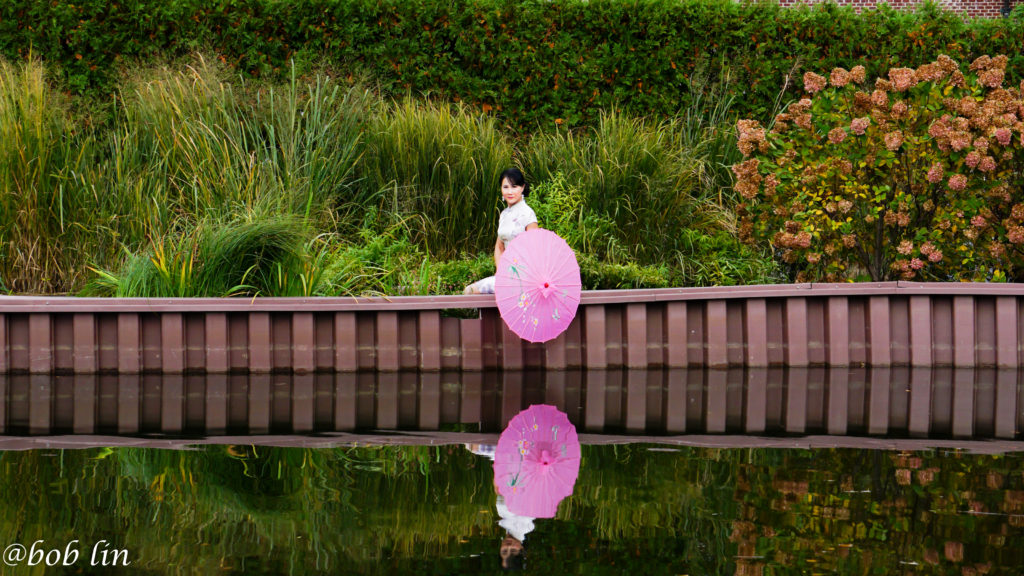
5. Filter the sunlight and flare by using umbrellas or a lens hood.
Open between 10 AM to 5 PM.


There are over 10 gardens and museums at Cantigny Park. 入口经常摆有沙发给拍照。

可以拍倒影。