Photoshop loads fonts from the computer it is running. To add a font for the Photoshop, you just need to install the font on the computer OS. The following is the example of installing and managing fonts on Windows 10. Here are how.
There are many ways to install and manage Fonts in Windows 10
Option 1: Settings
- To access Fonts page, click Start>Setting>Fonts
- Or type fonts I the Search bar., and then click on font settings.
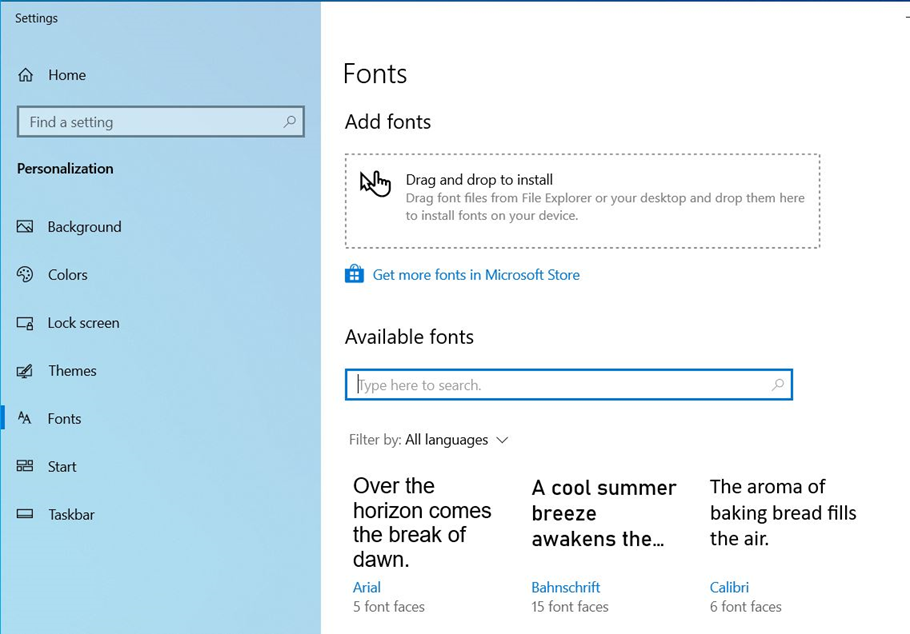
- With the Fonts page open, you can drag and drop a downloaded font into “Add fonts”
- To add more fonts, click on “Get more fonts in Microsoft Store”.
- To Manage fonts, click on available fonts.
- You will have options to change font size, Uninstall.
Option 2: Manage fonts in Control Panel
- Type control in search bar and click on Control Pane to open it.
In Control Panel, go to All Control Panel>Fonts.
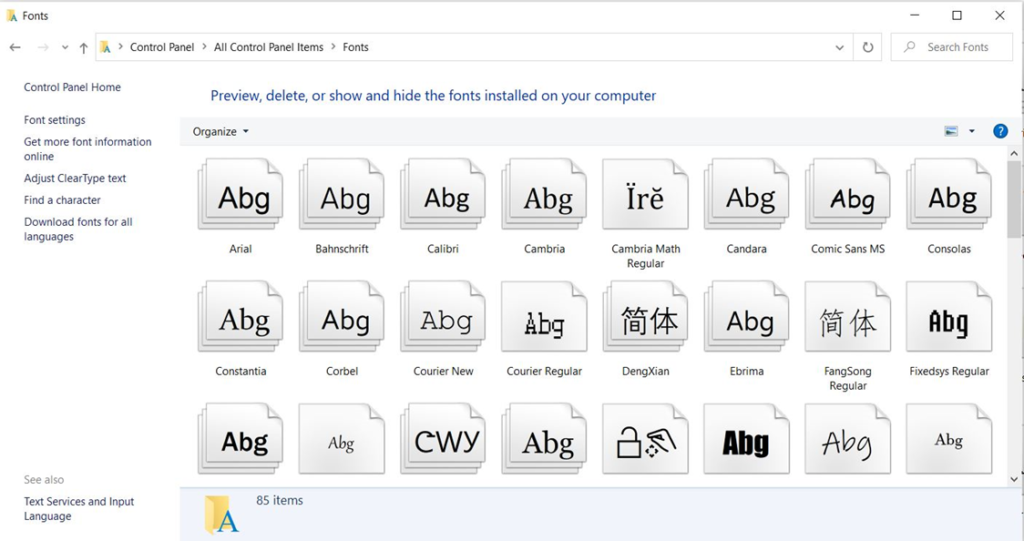
- You have options to Preview, delete, or show and hide the fonts installed on your computer.
- If you click on Font settings, you can Hide fonts, Restore default font settings, and Installation settings.
- You can Get more font information online.
- You can Adjust ClearType text
- You can Find a character.
- You can download fonts for all languages.
Option 3: Download and install fonts.
- Search the font online you want to use and save is in download folder. Right click to install. If you don’t see the install option, you can open it.
- Click Install to add the font into the Windows.
Please view this step by step video: