Troubleshooting DJI Mavic Air Calibrate Compass problem

Situation: The first try Mavic Air gets Compass error. Move aircraft or calibrate compass.

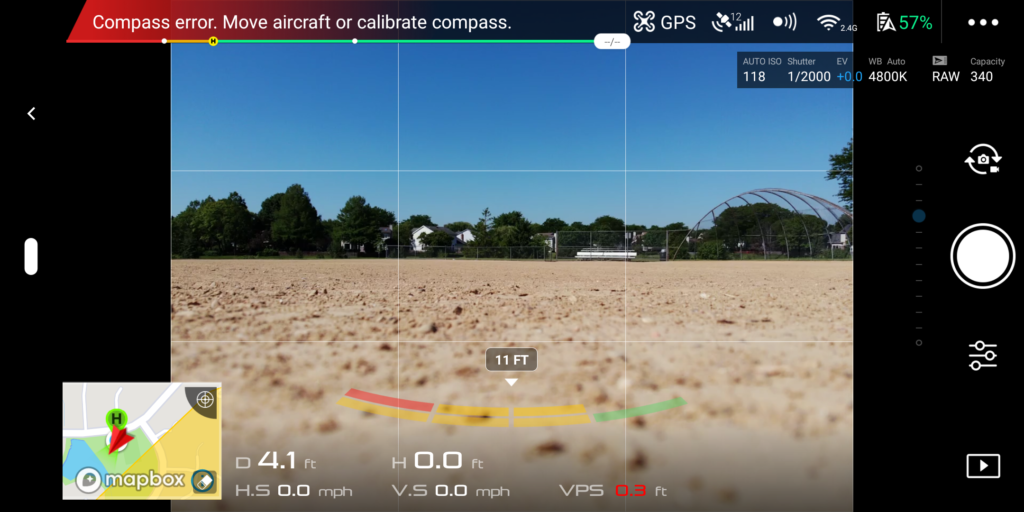
When trying to calibrate compass, it is always failed on step 2.

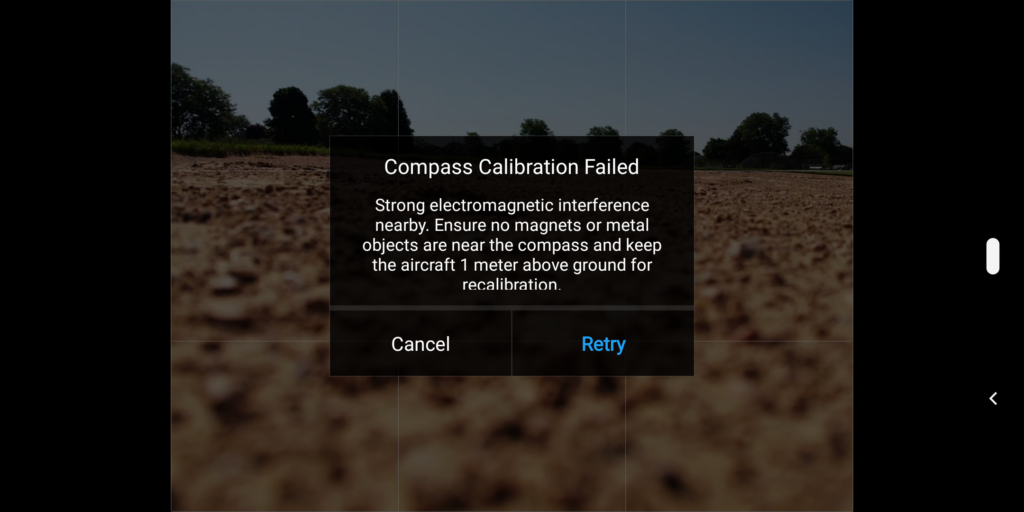
We have tried different places. But that doesn’t fix the problem. Sometimes, turn of the power and turn on again, it fixes the problem.

We have tries to reset it to factory. We also make sure it has the latest firmware.

Select an object using Blend If in Photoshop

Difficult selections like trees can be selected by using Blending If. Here is how..

  1. Double click on the image in Layer panel to open Blending Mode. If that doesn’t work, make sure it is no locked.

2. Since the background is blue sky, we select Blue in Blwnd if

3. Since we have only one layer, move the curse in this Layer from right to left until we see the transparent.

4. You can also adjust it by hold Alt key and move the half right curse.

5. Click OK to complete the selection.

6. You can move another image into the original image to see the result. In our example we change the Blending mode to Overlay.

Please view the step by step video:

Use Reduce Noise and Surface Blur to reduce Noise in Photoshop

  1. With the image open, make duplication by right click the Background Layer.

2. Go to Filter>Noise>Reduce Noise.

3. Increase Strength and Reduce Color Noise, decrease Preserve Details and Sharpen Details. Click Preview to compare.

4. Duplicate the Layer and go to Filter>Blur>Surface Blur.

5. Adjust Radius and Threshold.

6. Compare each layer to view the difference.

Please review step by step video.

Create sunset background using Match Color and Gradient Tool

  1. Open all images. Duplicate the Layer by right click on it.

2. Match the color by going to Image>Adjustment>Match Color. Select the source and adjust Fade, Luminance, Color Intensity.

3. Move the sunset image into original image.

4. Add a Vector Mask.

5. Select Gradient Tool and gradient sunset color from bottom to top. You may try more than once.

6. Result.

Please review the step by step 5 minute video:

Use the latest version of WeChat on your mobile and make sure that you have updated your mobile operating system to open this page.

Situation: When running video on PC Wechat, you may receive this message: Use the latest version of WeChat on your mobile and make sure that you have updated your mobile operating system to open this page.

Troubleshooting: If you download and install WeChat from Microsoft Store, you may see this message. You need to download and install WeChat from www.wechat.com.

Match and adjust Sunset background using Camera RAW Filter

Before

After

  1. Duplicate the image.

2. Also open another image you would like to match the color.

3. In the original image, go to Image>Adjustment>Match Color. Select the source image, adjust Fade, Luminance, Color Intensity.

4. Open Camera RAW Filter to adjust color, for example, Temperature, Tint, Exposure, Contract, Highlight, Shadows, White, Black, Clarity, Vbrance.

Please review the step by step video:

Please view 5 minute step by step video:

Sunset editing with Gradient Map in Photoshop

Before

After

  1. Duplicate the image by going to Layer.

2. Convert it to Smart Object by right click on the Layer. Note: with Smart Object, it is easy to make modify later.

3. Open Gradient Map on Adjustment Layer icon.

4. From the Gradient Map, select the color and change the Blending Mode to Soft Light. You can also adjust the Opacity.

5. You can do the Gradient Map multiple times. In next example, I will add another Gradient Map to brighter the shadow.

6. If you are not happen the result, you can go back to change the Gradient Map.

Please view the step by step video:

Create Sunset background using Brush Tool

Before

After

  1. Duplicate the image by going to Layer.

2. Add a new Layer.

3. Select Brush Tool with orange color.

4. Make a large size, 0% Hardness.

5. Click the Brush in any place.

6. Hold Ctrl+T to select the orange light area and adjust the size.

7. Change the Blending mode to Screen and you cam also adjust the Opacity.

8. Use the Move Tool to move the sunset light to the place you want.

Please view the step by step video:

How to make long legs in Photoshop

  1. Duplicate the image from the Layer.

2. Use the Selection Crop Tool to make the the high longer.

3. Use the Rectangular Marquee Tool to select the area you want to make it longer.

4. In the selected area, right click and select Free Transform.

5. Right click again and select Distort.

6. Distort to the bottom and click OK.

7. Deselect.

8. Compare before and after.

Please view the step by step video:

Blur Portrait background using Selection Tool and Tilt-Shift

Before

After

  1. Duplicate the image.

2. Use Selection Tool to select object.

3. Use the Selection Tool to select all areas you don’t want to blur.

4. Inverse by going to Select>Inverse, which selected blur areas.

5. Now, go to Filter>Blur Galley>Tilt-Shift

6. Adjust Tilt-Shift areas, Blur, Light Bokeh, Bokeh Color, Light Range.

7. Result.

Please view step by step video: