There are many ways to sharp an image in Photoshop. High Pass filter is one of them. The different is the High Pass filter only sharpens edges, and anything that’s not an edge becomes flat grey . Therefore, we use it a lot in portrait.
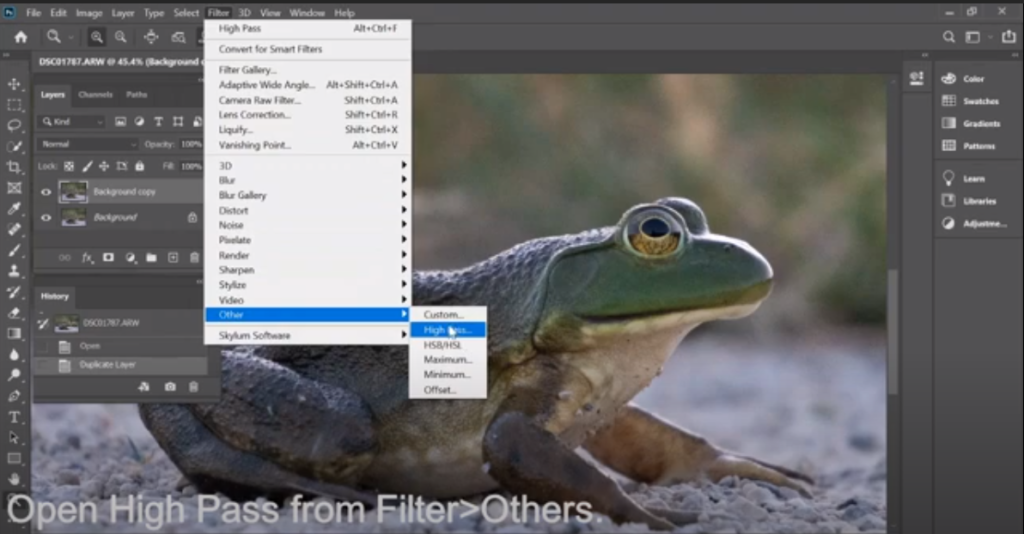
- With the image open, duplicate the layer.

2. Open High Pass from Filter>Others.
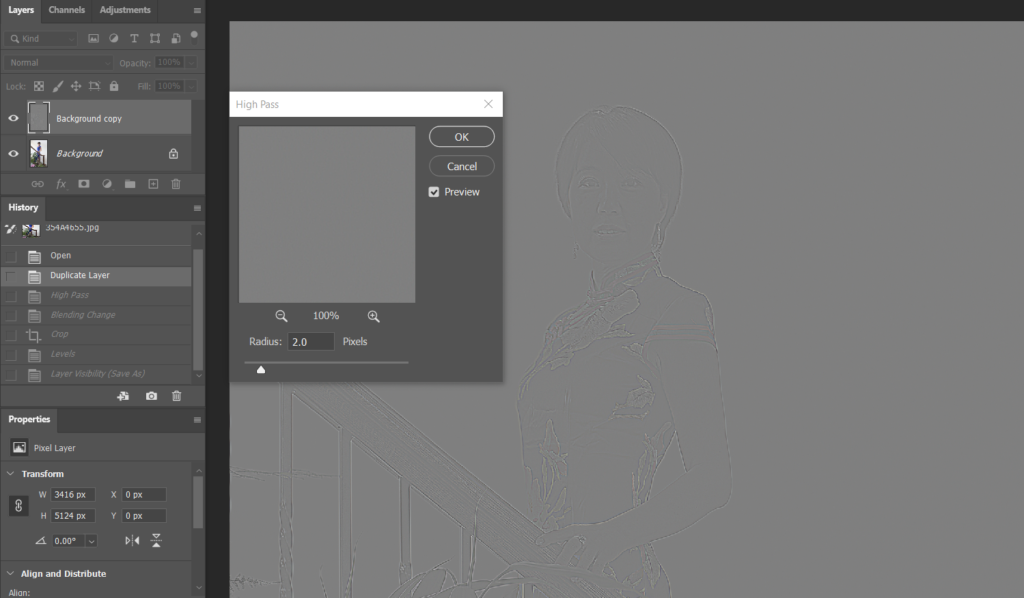
3. Set the Radius between 1 to 2 pixel. in most cases, 4 and above is too much.
4. Select Overlay or Soft light in Blending mode.
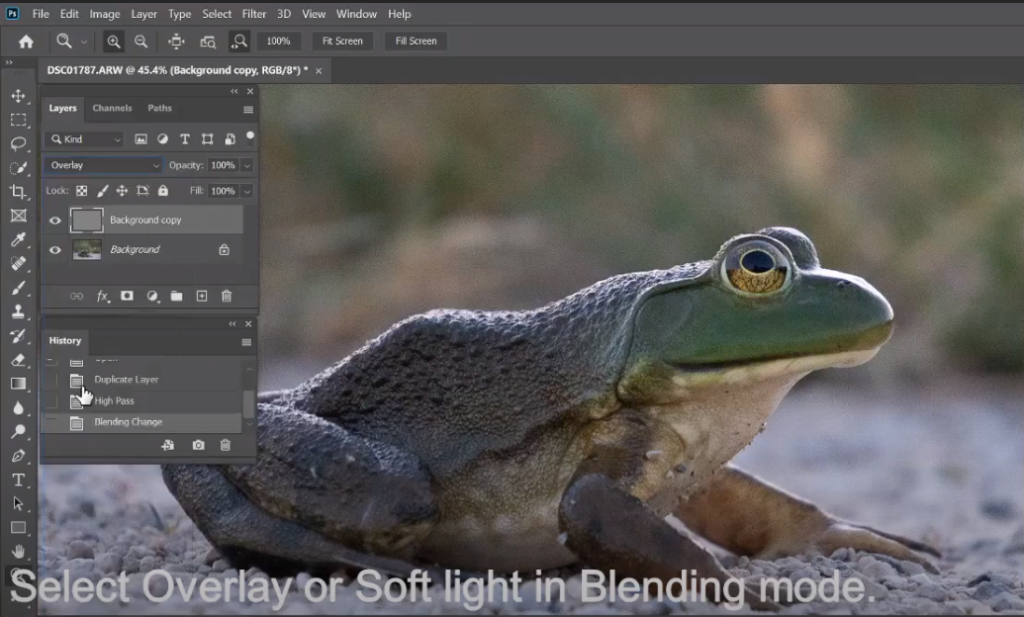
5. If you want to have more sharp, duplicate other layer.
Please view the step by step video: