
Bob Lin Photography services
Real Estate Photography services
How to install a Lightroom plug-in - Step by step with Screenshots
In this article, we will show you how to install Lightroom LRHaze plugins. Note: LRHaze plug-in works at present in Lightroom 6.1, 6.1.1, 6.2, 6.2.1 and 6.31. Download LRHaze plug-in from http://chicagotech.net/Tools/LRHaze_1_3.zip
2. Next unzip the plug-in so the LRHaze.lrplugin folder is created in LRPlugins, and the files Info.lua and LRHaze.lua are in the LRHaze.lrplugin folder. The location can be any place but you must have a folder named LRHaze.lrplugin containing the two .lua files.
3. Now open Lightroom, click on the File menu and select Plug-in Manager.
4. In the “Lightroom Plug-in Manager” window, click the Add button at the lower left and navigate to the LRPlugins folder, select the LRHaze.lrplugin folder and click the Select Folder button.
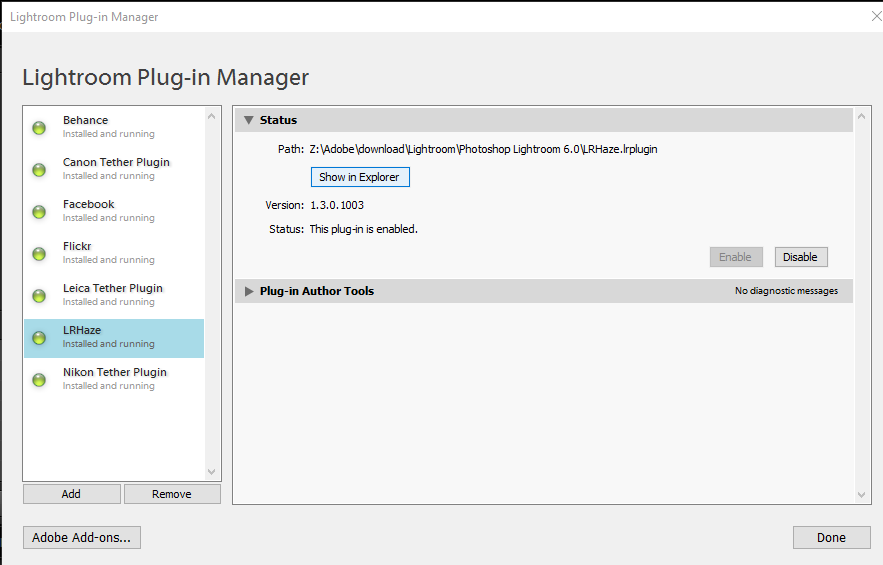
5. The plug-in should be installed and added to the list of installed plug-ins on the left of the Plug-in Manager as shown below. The main part of the Plug-in Manager window shows details of the selected plug-in and should show “Status: This plug-in is enabled.”
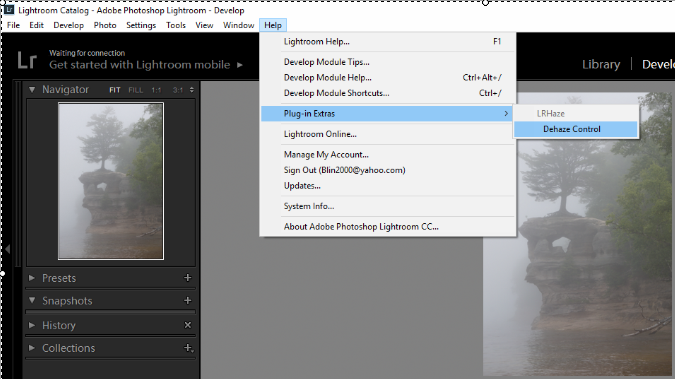
6. Once installed the plug-in, adds it as a menu item by going to
Help – Plug-In Extras – Dehaze Control
Note: You can only use it while in the Develop module. You can move the dehaze window to a place on the screen where it is not in the way, and it will remember this location. Change the slider and observe the effect on the current image. Click OK to close the Dehaze window and resume normal Lightroom editing, or Cancel to discard changes just made to the dehaze value. You may find the first click on the dehaze window is lost – just click it again.
For consulting service, Contact Us
|
|
Bob Lin Photography services
Real Estate Photography services
